


Let’s get real; our offices are filled with documents, spreadsheets, presentations, advertising materials, and client files – enough to get drowned under. Attempting to keep up with it all on separate computers, missing external hard drives, or just having it all through cloud storage, which costs something every month and raises security risks, is just like working in a digital jungle.
Enter the Network Attached Storage (NAS) device. Simply put, you require a private cloud where your team can safely store, share, and access files from any remote device that is part of the office network. It functions like a well-organized digital space that is available for collaboration with all members, boosting productivity.
Setting up a NAS seems too complicated, with networking terms and twisted cables. But do not worry! This guide will help you through the complete procedure step-by-step, helping you get the benefits of a NAS for your office.
Gathering Your Essentials
Prepare these beforehand before you begin:
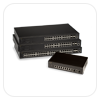
NAS Device: This is the heart of your operation. NAS devices have various shapes, sizes, and configurations-from single-bay units for small teams to multi-bay units for large offices with heavy storage demands. Consider your existing and future storage needs before making a decision. You also need to consider the number of drive bays, processing power, RAM, and available ports (such as Ethernet and USB).
Hard Drives: The NAS device usually doesn’t have storage included. You’ll need to buy the required hard drives. Consider the amount of capacity you need and whether you wish to use RAID (Redundant Array of Independent Disks) for data redundancy. NAS drives are frequently the best to buy as they are specially made for ongoing use.
Network Cable (Ethernet): Your NAS will be connected to your office network through an Ethernet cable. Make sure you have a free port on your router or switch.
A Computer: You’ll need a computer (laptop or desktop) that’s connected to the same network as your NAS for the initial setup.
Your Router: This is the hub of your office network, and your NAS will have to be connected to it.
Patience and a Cup of Coffee (or Tea!): Although setting up a NAS is not rocket science, it does require your attention to detail. Go slow, and don’t hesitate to return to this guide or your NAS device manual.
Let’s Get Started: The Step-by-Step Guide
Now, you’ve got your essentials in hand. Let’s get to installing your NAS.
Step 1: Physical Setup-Plugging Things In.
This is the most straightforward part. Think of it as connecting the building blocks.
Install the Hard Drives: Open the drive bays of your NAS device (see the manual of your device for step-by-step guidance). Gently put the hard drives into the bays in such a manner that they get connected properly and firmly. A few NAS devices have trays, and you need to screw the drives first before you insert them.
Plug Into Your Network: Plug one end of the Ethernet cable into the Ethernet port at the back of your NAS and the other end into any of the unused Ethernet ports of your router or network switch.
Connect to Your Network: Use the Ethernet cable to connect one end to the Ethernet port in the back of your NAS and the other to an Ethernet port on your network switch or router.
Power It Up: The power adapter gets plugged into your NAS. Put the other side into a power outlet. Power it on by pushing the button. You will see the indicator lights blinking while the device is booting up.
Step 2: Initial Configuration
You have now got your NAS plugged in physically; you have to communicate with it from your computer to configure the fundamental settings of the NAS.
Find Your NAS: Most NAS makers include a setup utility or web interface for initial configuration. This tool may be on a CD that came with your NAS, or you’ll have to access it from the manufacturer’s site. The latest NAS models can be found using a web browser by navigating a designated address or by accessing a network discovery tool on your operating system. Consult your NAS device’s manual for the preferred method.
Start Setup Utility or Access Web Interface: Follow the instructions from the utility or refer to your NAS manual to begin the setup procedure. This often involves accepting terms of service.
Basic Network Settings: The setup wizard must guide you through setting basic network settings. In most cases, you can simply allow your NAS to automatically get an IP address from your router (DHCP). For convenience and ease of access and management in the future, though, it’s usually a good idea to set a static IP address to your NAS. You’ll need to do this in your router settings and then input the selected static IP address into the NAS installation.
Administrator Account Creation: You will be asked to create an administrator account with a username and a strong, unique password. This account will provide you with complete access to manage your NAS. Make sure you save these credentials!
Time and Date Settings: Make sure to set the time and date on your NAS correctly. It is essential for file timestamps and logs.
Step 3: Storage Setup – Organizing Your Digital Vault
Now, you have to configure the way your NAS will utilize the hard drives you’ve installed.
RAID Setup (Optional but Recommended): You’ll probably have an option to configure a RAID array if you’ve installed more than one hard drive. RAID consolidates multiple physical drives into a single logical unit, providing advantages such as higher performance, redundancy of data (drive failure protection), or a mix of both.
RAID 1 (mirroring – data is copied over drives), RAID 5 (striping with parity – provides a balance of performance and redundancy), and RAID 6 (like RAID 5 but with two parity blocks for more fault tolerance) are standard RAID levels. Select the RAID level appropriate for your office’s data security and performance requirements. Take notice that the RAID configuration will delete data on the drives.
Creating Volumes or Storage Pools: After your RAID setup (if any) is done, you’ll have to create volumes or storage pools. These are the storage spaces available for use on your NAS. You can create a single large volume across all available storage or several smaller volumes for various uses.
Step 4: Creating Shared Folders – Making Files Accessible
Shared folders are how various users and machines on your network access NAS-based files.
Go into the NAS Management Interface: Open your NAS web-based management portal with your earlier-created administrator account.
Get to the Shared Folder Settings: Find a section labeled “Shared Folders,” “Network Shares,” or a similar one.
Create New Shared Folders: Select the option to create a new shared folder. You will need to name it (e.g., “Marketing,” “Sales,” “Shared Documents”).
Set Permissions: You can specify which group of users can have read-only, read/write, or no access to each shared folder. Carefully consider who should be given access to which files.
Step 5: User and Group Management-Control of Access.
You have to set up a user account(s) and possibly groups to manage access to shared folders appropriately.
Go to User/Group Settings: Find sections named “Users” and “Groups” in the NAS management interface.
Create User Accounts: Set up individual user accounts for each member who has to access the NAS. Provide them with distinctive usernames and powerful passwords.
Create Groups (Optional but Recommended for Larger Offices): Groups enable you to control permissions for several users at once. For instance, you might create a “Marketing Team” group and assign it certain access rights to the “Marketing” shared folder. You can then add or remove users from this group as necessary.
Assign users to groups: Add users into the corresponding groups.
Step 6: Accessing Your NAS: Connecting from Your Computers.
Well, now that your NAS configuration and shared folders have been established, you should now connect it from office computers. The connectivity process varies a bit depending on the operating system you are using.
For Windows:
Open the Explorer: Press the Windows key + E.
Navigate to “Network”: In the left-hand pane, click on “Network.” Your NAS should appear under “Storage” or “Computer.”
Map Network Drive (Ideal for Simple Access): Right-click your NAS device and select “Map network drive.”
Choose a Drive Letter: Choose an available drive letter (e.g., Z:).
Navigate for Shared Folders: Click the “Browse” button. Now, pick the shared folder you want to map.
Optional: Reconnect at Sign-in: Select the box beside “Reconnect at sign-in” if you wish for the drive to reconnect every time you sign in to your computer.
Click “Finish.” Your shared folder will now be displayed as a network drive in your File Explorer.
For macOS:
Open Finder: Tab the Finder icon in your Dock.
Go to “Go” in the Menu Bar: Open “Go” and choose “Connect to Server.” (or use Command + K).
Enter the NAS Address: In the “Server Address” field, type smb://your_nas_ip_address (insert your NAS IP address in place of your_nas_ip_address).
Click “Connect.”
Choose Shared Folders: You will get a window where you need to choose which shared folders you’d like to connect to.
Enter Your Credentials: When asked, enter your NAS username and your password.
Optional: Add to Favorites: You may drag the mounted shared folder to the Finder sidebar for quick access in the future.
Step 7: Tapping into Advanced Features (Optional but Powerful)
After your basic NAS configuration is done, you can also go through some of the advanced features most NAS devices provide:
Backup Solutions: The majority of NAS units come with integrated backup software that enables you to copy data from your computers to the NAS or even to backup the data from the NAS to external storage devices or cloud services.
Media Server: If your office works extensively with multimedia files, you can have a media server installed on your NAS so that you can stream content to computers, smart TVs, and other devices.
Cloud Synchronization: Most NAS devices also let you sync files with cloud storage services like OneDrive, Google Drive, or Dropbox.
Mobile Apps: A mobile app offered by numerous manufacturers will permit their users to survey their files through remote links.
Security Features: Examine the security features on your NAS device, such as options for firewalls and encryption.
Final Thoughts: Your Digital Transformation
With NAS installed in your workplace, you can have centralized storage, improved teamwork, and protected files. Make certain to read NAS’s manual to get the total command-with reference to additional facilities. Discover and enjoy your fresh digital vault, and don’t miss being patient with this guide. you’ll find out about what wonders it can do for your workplace!


