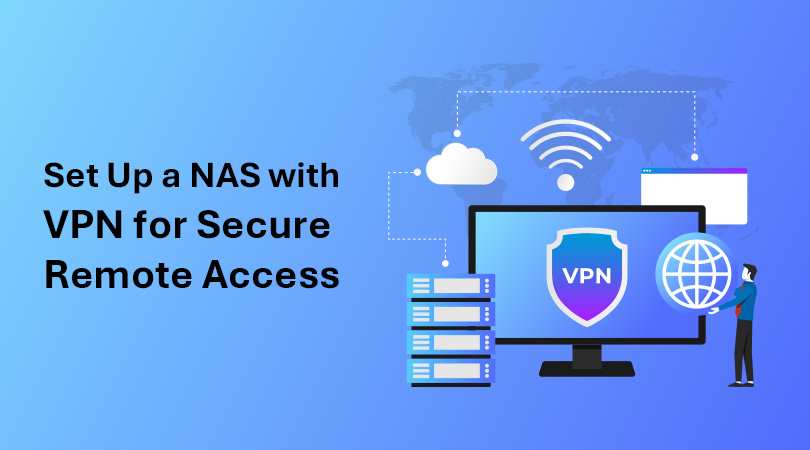
The main purpose of setting up a NAS with a VPN for secure remote access is to configure both the NAS device and the network to establish a secure tunnel between the remote device, your office, or your home network. Once this tunnel is in place, you will be able to access NAS files and services as if you were on a local network. This makes sure that all information is kept safe from eavesdropping.
Following is a step-by-step guide that describes the whole process of installing a NAS with VPN for safe remote access:
Phase 1: Choosing the Correct VPN Configuration
There are two fundamental ways to create VPN access to your NAS:
VPN Server on the NAS: There are certain NAS devices that have built-in VPN Server capabilities. What this means is that the NAS itself manages incoming VPN connections from remote devices.
VPN Server on the Router: The other choice is to set up the router as a VPN server. This way, all devices on the protected network are covered by the VPN, not just the NAS.
This guide will focus on the setup where the VPN server is configured directly on the NAS, as most modern NAS devices offer this functionality. This approach is particularly suitable for secure remote access to the NAS itself. However, the port forwarding and client configuration steps will still be relevant if you choose to set up the VPN server on the router.
Phase 2: Configuring the VPN Server on Your NAS
Actual steps may vary based on the brand and model of your NAS (for example, Synology, QNAP, Asustor, etc.). Be sure to consult your NAS user manual for step-by-step instructions. The broad steps you would need to go through will be as follows:
Log in to Your NAS Management Interface: Start by opening your web browser. Now, enter the IP address of your NAS device, and enter the administrative interface. Log in with administrator credentials.
Locate the VPN Server Settings: Go to the network or connection settings. Look for options that are labeled similar to “VPN Server.
Enable VPN Server: Activate the VPN server feature.
Select a VPN Protocol: You will have to select from one or multiple VPN protocols. Here are some common options, in a rough order of security and performance (this may change from time to time):
- WireGuard: Generally regarded as modern, secure, and fast – it’s the best choice supported by a NAS.
- OpenVPN: Well-known and secure, it is an open-source protocol with adequate performance and broad platform support.
- L2TP/IPsec: Common but generally considered to be less secure and more difficult to configure with firewalls.
- PPTP: An older protocol that can be deployed easily but has serious security vulnerabilities. Avoiding PPTP would be better unless there is no alternative, and you know the risks involved.
Configure VPN Settings:
- Address Pool or IP Range: Identify the range of private IP addresses to be allocated to VPN clients during connection establishment. Make sure this range is not overlapping with the IP address range of your local network.
Authentication: Determine how the VPN clients authenticate. Some common methods are as follows:
- Local Users—Using accounts created on your NAS.
- RADIUS—Authenticate against a RADIUS server, which is more common in enterprise environments.
Encryption Settings: Choose the strongest encryption algorithms (e.g., AES-256 for OpenVPN if applicable) under Encryption Settings.
Port: Note down the port number on which the VPN server will listen (e.g., 1194 for OpenVPN, 51820 for WireGuard, 1701 for L2TP). You will need this to forward the port on your router.
Client Configuration Export: Many NAS devices would allow you to export a configuration file or give instructions for manually configuring the VPN client.
Apply Settings: Save the VPN server configuration on your NAS.
Phase 3: Configuring Router for Port Forwarding
For allowing remote devices to connect to your NAS’s VPN server outside of your local network, you need to allow port forwarding on your router.
Access Router Settings: Open a web browser. Now, enter the IP address of your router (it is generally 192.168.1.1 or 192.168.0.1). Log in using the administrator credentials for your router.
Locate the Port Forwarding Settings: Look through the settings for sections labeled “Port Forwarding,” “NAT Forwarding,” “Virtual Server,” or something similar. The exact name and location will be based on your router’s brand and model.
Enter a New Port Forwarding Rule:
Service Name (optional): You may assign a descriptive name to the rule (e.g., “NAS OpenVPN,” “NAS WireGuard”).
Protocol: Choose the protocol you set up for your VPN server on the NAS (UDP or TCP or both); OpenVPN typically uses UDP, WireGuard typically uses UDP, L2TP/IPsec uses UDP port 500 and port 4500, and the ESP protocol (which might not be selectable as TCP/UDP).
- External/Public Port: Enter the port number your VPN server is listening on. If the protocol uses multiple ports, you may need to specify a range.
- Internal/Private Port: Enter the exact port number as the outside port.
- Internal IP Address/Destination IP: Type in the private IP address of your NAS device on your local network; this can typically be found in the NAS network settings or your router’s list of connected devices.
- Save the Port Forwarding Rule: Apply changes to your router’s configuration.
Phase 4: Configure the other VPN Client
You’ll need to configure a VPN client on each device you want to use for remotely accessing your NAS.
Select a VPN Client
- Integrated OS VPN Clients: All recent operating systems, including Windows, macOS, Android, and iOS devices, include a built-in VPN client that supports most of the protocols currently being utilized, such as L2TP/IPsec, and in some instances, OpenVPN support.
- Third-party VPN Clients: Sometimes you will need to install a client application like OpenVPN Connect or the WireGuard app in case of OpenVPN and WireGuard protocols. Occasionally, your NAS provider may offer client software or configuration files for you.
Configure the VPN Connection:
- Server Address/Hostname: Enter the public IP address or dynamic DNS hostname of your home/office internet connection. You can use Google to find your public IP by searching “what is my IP”. If your public IP changes frequently, then it’s better to configure DDNS on your router or on NAS.
- VPN Protocol: Select the same protocol you configured on your NAS server.
- Authentication: Enter the username and password of a permitted user to use your NAS’s VPN (if you are using local users). In case you have exported a configuration file, you might need to import it into the VPN client.
- Pre-shared Key/Secret (in case of L2TP/IPsec): If you configured a pre-shared key on your NAS, you’ll need to enter it in the client settings.
- Certificate (for OpenVPN): If your OpenVPN configuration uses certificates, import the client certificate into the VPN client.
- Save VPN Connection Settings.
Phase 5: Testing the Connection to the VPN
- Connect from the Foreign Network: Use mobile data or a public Wi-Fi network to access the remote device, ensuring that the device is not on the same local network.
- Initialize the VPN Connection: Launch the VPN client and try to connect to the VPN server set up by you.
- Confirmation of the Connection: Verify whether the connection to the VPN was successful. This way, the machine should have a private IP address along with the defined range within the NAS.
- NAS Accessing: Verify access to the files and services on NAS by the local IP address or hostname in case DNS resolution is activated over the VPN.
Phase 6: Security Issues
- Strong Passwords: Strong and different passwords for NAS admin username, VPN user account, and router login.
- Firmware Updates Regularly: Patch security vulnerabilities by updating the latest firmware in your NAS, router, and VPN client and server software programs on a regular basis.
- NAS Firewall: The NAS firewall must be enabled and properly configured, and ideally should allow only access for certain necessary services.
- Strong encryption: Use a strong cipher for your VPN protocol (e.g., AES-256 on OpenVPN and WireGuard).
- 2FA Recommended: If available, enable 2FA on your NAS to add an extra layer of security.
- Limit VPN Access: Only allow VPN access to those who should have it.
- Log VPN: Check your VPN server log on a NAS from time to time for any indication of malicious activity.
These various steps can be used in establishing a secure VPN connection to your NAS. Now you must be securely accessing your services and data without any thought of ‘where’, ‘if’, or ‘when’. But don’t forget to consult your NAS manufacturer’s manual and router guidebook, because they should have some special data for your device.


